You’ve just taken what you thought was the perfect portrait. Your subject looked fantastic, the lighting was sublime, and you captured some real magic. But when you look at the photo on your computer screen later, you can’t help feeling a little disappointed. The colours look a bit off, the skin is uneven, and some of the finer details have been lost. Sound familiar? Don’t delete that shot just yet! With a few simple edits in Skylum, you can take that good photo and turn it into a truly stunning portrait. In this guide, we’ll walk you through all the tools and techniques you need to perfect portraits and get professional results every time. From subtly enhancing eyes, skin, and hair to applying a range of gorgeous preset effects, you’ll learn how to make small tweaks that make a big difference. So get ready to take your portraits from drab to fab with just a few clicks of the mouse. With the right editing software, you really can turn any portrait into a work of art.
An Introduction to Portrait Retouching With Skylum
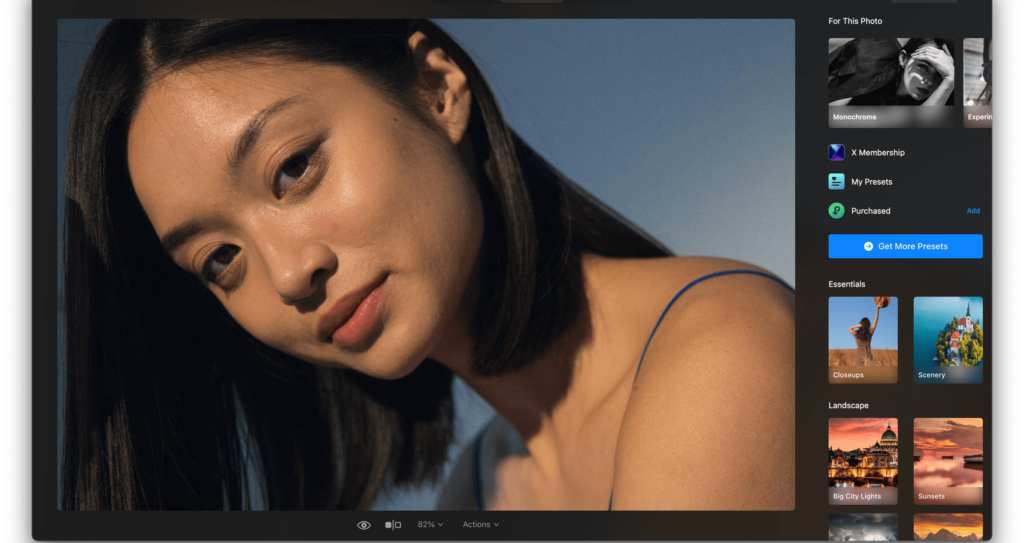
Ready to take your portrait editing game to the next level? Skylum’s AI-powered software like Luminar Neo makes retouching portraits an absolute breeze – even for beginners. Here’s a quick rundown of how to get started:
- First, open your image in Luminar Neo and head to the ‘Portrait’ section. This is where you’ll find all the portrait-specific tools you need to make magic happen.
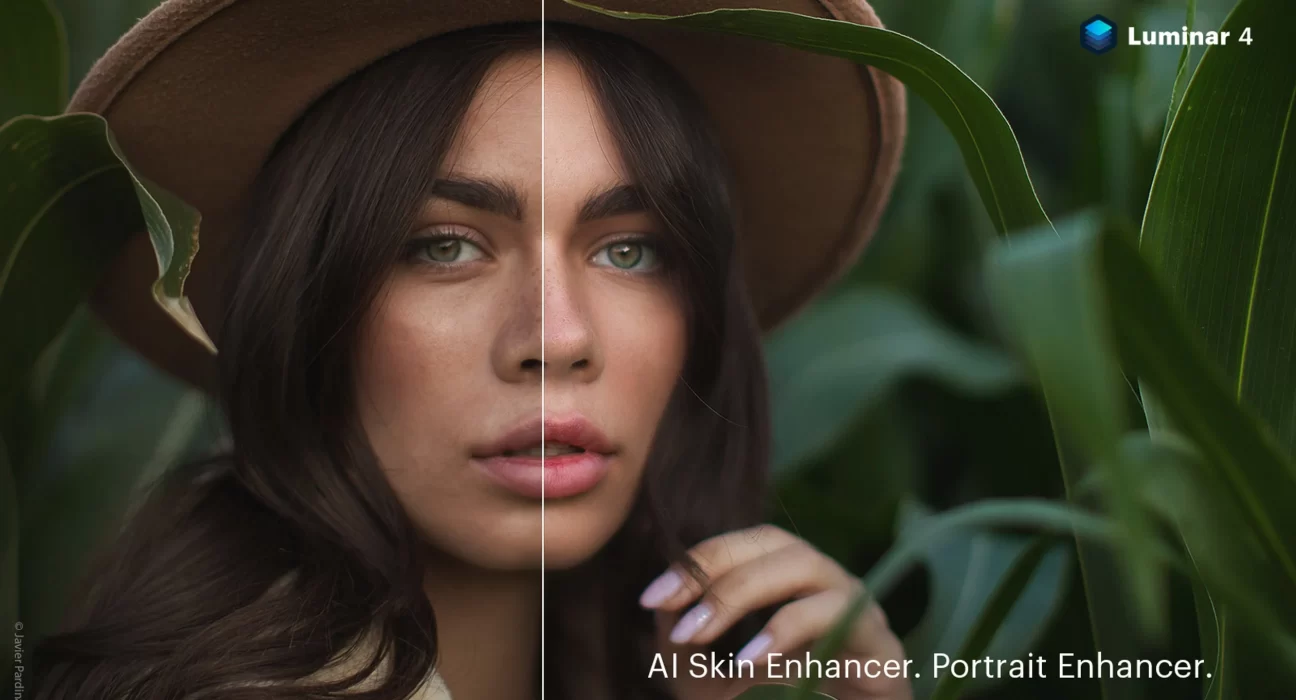
- The ‘Face AI’ feature is awesome for detecting faces and applying automatic enhancements to skin tone, texture, eyes, mouth and more. Give it a whirl and see if you like the results!
- For manual touch-ups, reach for the Skin Smoothing tool to even out skin. Dial back the opacity to keep it looking natural. The Skin Tone tool is also great for balancing patches of colour.
- Don’t forget the eyes and teeth! The Eye Lightening tool adds a twinkle, while the Whiten Teeth tool polishes up those pearly whites. Subtlety is key here.
- Finally, enhance the hair with the Hair AI tool or go manual with the Hair Details filter to add shine and texture.
The best part is you can do all this with just a few clicks thanks to the assistive AI. Take your time, tweak the results and have fun making ordinary portraits extraordinary!
Step-by-Step Guide to Retouching Portraits in Skylum Luminar
With Luminar’s powerful portrait tools, you can transform your portraits. Here’s how to make your subjects shine:
- Open your image and go to the Portrait tab. This has all the tools you need to retouch skin, eyes, teeth and more.
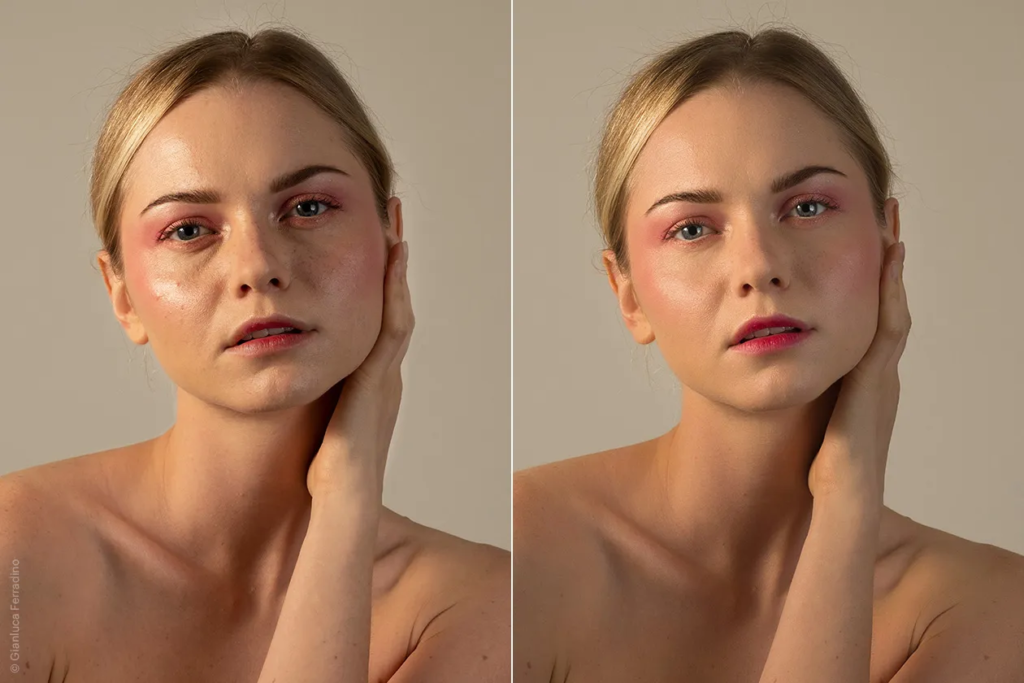
- Start by using the Skin Enhancer to smooth skin and hide blemishes. Use the sliders to control the effect – you just want to subtly improve things, not plasticize your subject!
- Next, go to Face Lighting and lift shadows to illuminate your subject’s face. This makes them glow. You can also soften any harsh lighting.
- Now for Eyes & Lips. Use the sliders to brighten eyes, make whites whiter and sharpen details. For lips, intensify colour and add definition.
- Whiten teeth if needed with the Teeth Whitening tool. And don’t forget to sharpen the Eyebrows!
- Use Face Sculpt to subtly slim and define facial features. Go easy here – small adjustments are all you need.
- Finally, look at Liquify Face to make minor tweaks. Lift droopy eyes or adjust the smile. This takes practise so refer to tutorials.
With care and subtlety, these tools help you make portraits look naturally gorgeous. Play with the sliders and settings until you get it just right!
Skylum Tools and Features for Perfecting Portraits
When editing portraits in Skylum LuminarAI, you have access to a robust set of tools to take your images to the next level. Here are some of the most helpful portrait tools to try:
- Portrait Enhancer – This intelligently enhances facial features while retaining a natural look. Just paint it over the face and adjust the slider to your liking.
- Skin Smoothing – Great for minimising blemishes and wrinkles. Go easy on the slider to avoid an overly airbrushed effect.
- Face Relighting – Use this to add catchlights to the eyes or illuminate the face.
- Eye Enhancing – Make eyes pop by intensifying colour and adding contrast around the iris.
- Mouth Reddening – Boost lip colour subtly for a more vibrant look.
- Face Sculpt – Slim and contour the face by painting on targeted areas.
- Iris Enhancing – Boost iris brightness and contrast for added depth.
Take advantage of layering these adjustments and use masking to apply edits only where desired. Don’t go overboard – small tweaks are best for a natural, flattering result. With practise, you’ll be able to perfect any portrait in LuminarAI.
So there you have it – with a few simple tweaks, you can take your portraits from drab to fab in Skylum Luminar. A bit of skin smoothing here, some beard taming there, and just like that, you’ve got professional-looking portraits anyone would be proud of. The best part is, with Luminar’s intuitive tools and presets, you don’t need years of Photoshop experience to get magazine-worthy results. So grab those lacklustre photos clogging up your hard drive and get editing! In no time at all, you’ll have a stunning portfolio of portraits you can’t wait to print and hang on your wall. Just remember – a little goes a long way. You want to enhance, not overwhelm. When in doubt, edit less rather than more. Perfection doesn’t exist in nature, so let the beauty of your subjects shine through. Happy editing!