Have you ever wanted to improve your photos but felt daunted at the thought of learning complicated editing software? Don’t worry – with this guide, you’ll be enhancing your shots like a pro in no time. Skylum’s user-friendly tools make it easy for complete beginners to start editing their images. In just a few simple steps, you’ll learn how to crop, adjust lighting and colours, apply cool effects, and take your photography to the next level. No need for expensive courses or years of experience. We’ll walk you through the basics and have you editing photos like a master after reading this. So grab your camera, open up Skylum, and let’s get started with photo editing made easy!
Introducing Skylum Software: An Overview for Beginners
If you’re just getting started with photo editing, Skylum’s user-friendly software is a great option. Skylum makes several photo editing programmes, including Luminar and Aurora HDR. Here’s a quick intro to what beginners need to know:
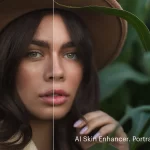
- Luminar is an AI-powered editing app that makes complex edits like sky replacement easy. It has filters, tools to fix blemishes and enhance portraits, and more. Great for basic editing and creative effects.
- Aurora HDR creates beautiful HDR images by combining multiple exposures. It has tools to enhance details, colour, and lighting. Perfect for landscape shots.
- Both work as plugins for Lightroom and Photoshop too.
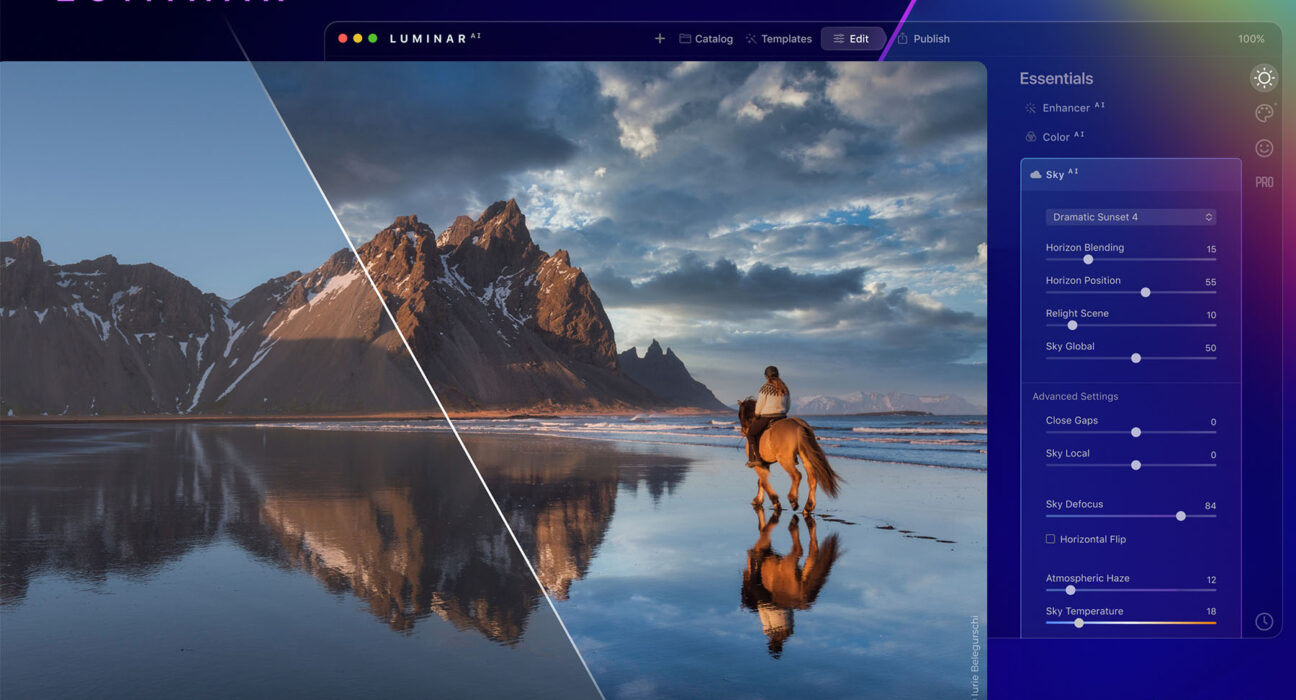
- The apps use artificial intelligence to instantly improve photos with one click. Their “AI Sky Replacement” and “AI Structure” tools magically edit skies and objects.
- The interface is simple and intuitive. You get step-by-step tutorials right in the apps.
- There are mobile versions for editing on the go from your phone or tablet.
- Skylum offers free trials so you can test drive the software.
- There are options for one-time purchases or annual subscriptions.
So if you want pro-level results without the learning curve, Skylum is a beginner-friendly pick for AI-powered photo editing. The smart tools make it easy to get professional shots.
Getting Started With Skylum: Installation and Interface
Ready to dive into photo editing with Skylum? Let’s go over the basics to get you up and running.
- First, head to Skylum’s website and download Luminar. The installation is super easy – just follow the prompts.
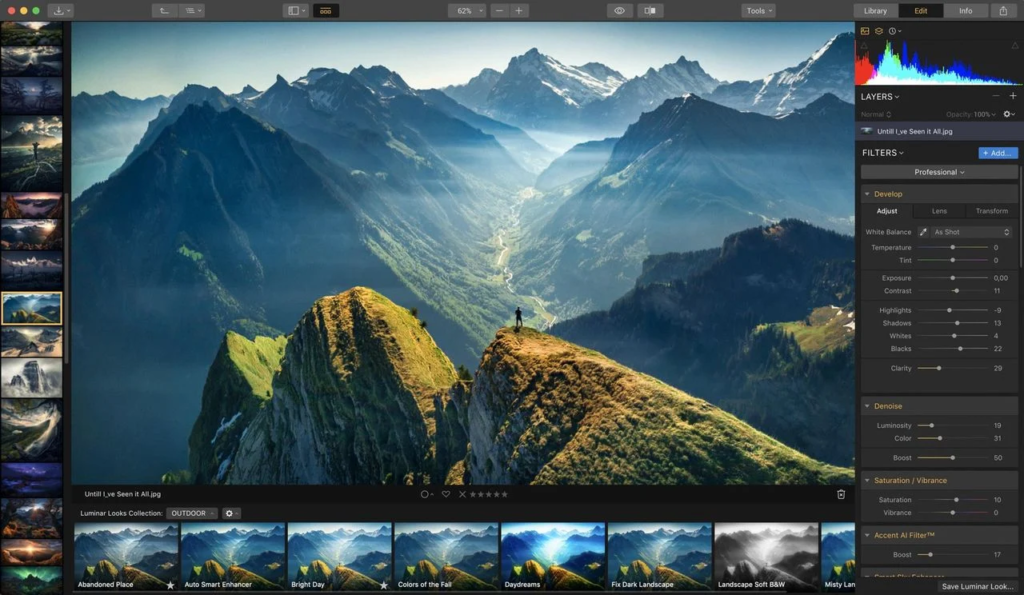
- Once installed, open Luminar and take a minute to get familiar with the interface. The main window shows your photos on the left and tools on the right.
- The Photos panel displays folders and images. Use it to navigate photos and import new ones.
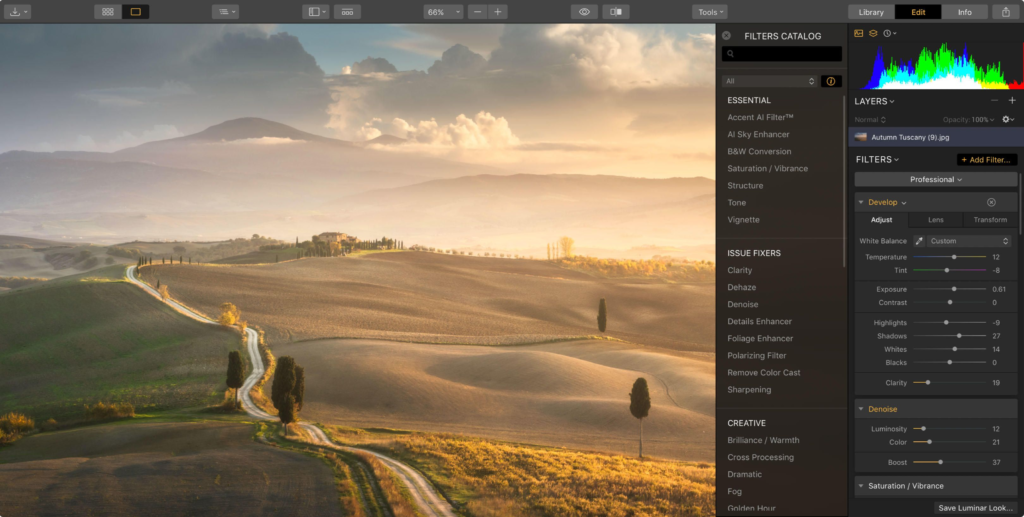
- The Tools panel contains all editing features like Filters, Crop, Transform and more. This is where the magic happens!
- Across the top you’ll see options like Edit, Layer and View. Click through each menu to see all the settings available.
- Don’t forget the preset filters under Looks. They make complex edits with one click.
- When you’re ready, import a photo and start playing around. Click filters to apply edits. Use the before/after view to compare changes.
- If you get stuck, check Luminar’s manuals and tutorials. Or their forum has an active community ready to help beginners.
The key is to dive in and experiment! Skylum makes amazing photo editing achievable for everyone. With practise, you’ll be a pro editor in no time.
Mastering the Basics: Key Photo Editing Tools and Techniques
When you’re just starting out with photo editing, it can feel overwhelming with so many options in Skylum software like LuminarAI. Don’t worry! You only need to master a few key tools and techniques to take your photos to the next level.
- Use the AI Augmentation slider to instantly enhance any image. This provides an automatic improvement by adjusting things like colour, tone, lighting, and detail.
- The Accent AI filter is great for beginners. It intelligently analyses a photo and makes adjustments tailored specifically to that image.
- Crop Tool – Crop away unnecessary background portions and adjust composition. Use grid overlays as a guide.
- Clarity – Increase this to make details and textures pop. Reduce it to soften an image.
- Contrast – Higher contrast makes an image punchier. Lower contrast creates a more muted, faded look.
- Saturation – Boost this to make colours more vivid and lively. Desaturate for a more muted black and white style.
- Always adjust white balance to remove unrealistic colour casts and make whites actually white.
With just these basic tools and some practise, you’ll be editing photos like a pro in no time. Don’t be afraid to experiment with all the filters – you can always reset your changes.
So there you have it – a beginner’s guide to getting started with photo editing using Skylum software. We’ve covered the basics from opening your first image to making edits and adjustments, as well as saving and exporting your creations. Don’t be afraid to experiment and find your own style. The more you practise, the more comfortable you’ll become. Skylum makes photo editing accessible for everyone, so grab your images and let the creativity flow! Remember, there’s no right or wrong when it comes to art. The most important thing is that you have fun and enjoy the journey. Now it’s time for you to take what you’ve learned and start editing. We can’t wait to see what you create!